And that makes me not a horrible blogger. More like, a nice blogger.
I'm going to change gears entirely.
I made something this morning and I want to show you how I did it. I made this.

It used to be a t-shirt but now it's a skirt. And it took about an hour.
I was browsing Pintrest because, I mean, what the heck else am I going to do on a Sunday morning? I was looking for an idea for a Halloween costume (don't judge me, I want to look adorbs mcgorbs at the Annual Epic Halloween Party of Epicness). But instead, I found this. And I looked at it for about fifteen seconds and said, out loud, "Yeah... I can do that." And I went to the closet and found this t-shirt that I wore a lot in college. It's too gross to wear in public but it's old so it's soft.
It's important to note that my step numbers do not correspond to those in the link, above. But that one probably is a lot more concise than what I'm writing here...
...so what's the point here? Power through.

Step One: Gather Materials/ Select a Soundtrack.
For this project, I decided to stream Megan Tonjes on Spotify. (Sidenote: I know you don't listen to Megan Tonjes but, look, you should. Just listen to this while you read the rest of this post and you'll listen to what I was listening to during this project. So, that'll be fun. Yeah? Also, Spotify. Do it. You won't regret it. Unless you do, in which I can only say, "Well, that's weird.")
You will need:
A t-shirt!
A pair of scissors!
A needle!
Threads!
That's it and that's all.
 Step 2: This is the part where I cut off the sleeves. I didn't cut them off entirely, I cut them into short sleeves. So if you have a t-shirt with short sleeves, and you probably do, then you just eliminated one step. Celebrate with a cream soda and proceed to Step 3. (Side note: if you forgo the cream soda part, you'll also save yourself some time.)
I upped the contrast in these photos to an annoying level so that you could see the thread when I started making stitches.
But then I noticed that you still couldn't see them that well, so I just doodled them on--which you will notice in Step 3.
 On to Step 3:
What you're going to want to do, here, is sew up the sleeves. Why? Why would you do that? Because when all is said and done, you turn the sleeves inside and bam! Pockets. Your skirt has pockets.
 Step 4 is a super important step to remember because if you don't make a cut from the neck to the shoulder down the seam, then you won't be able to fit into your skirt. Unless you are a very, very skinny lady. And even then, your skirt will be oddly shaped.
After you make that cut, you need to fold down the neck and stitch it up. Across. I didn't take a picture of it. I don't know why... I thought I did. But I did not. For that, I apologize. You can probably get an idea of how to do this step if you look at the link I posted earlier. I'll post it again right here. If not, surely you'll look at this project and say "how will I keep this up on my body so that it does not fall off?" And your problem solving skills, combined with your needle and thread will come up with something pretty easily.
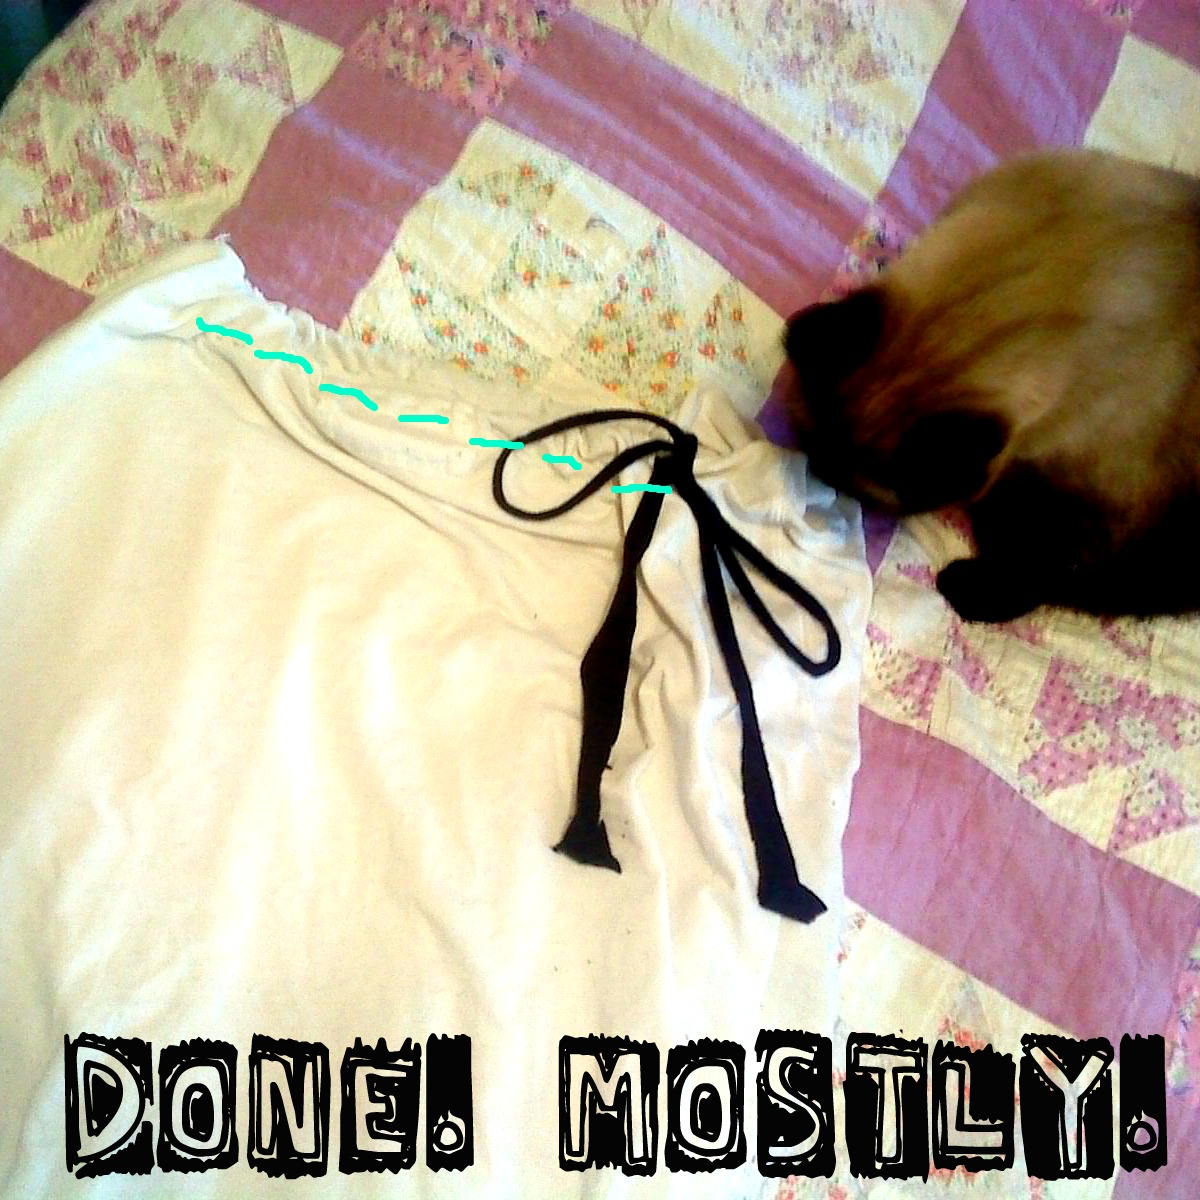
I suppose you could probably put an elastic band in there or something but I just used a bit from an old t-shirt that I modified earlier this week and run it through the top to tie it on the side. Can you see it? Do you see it? Can you see?
it really takes hardly any time at all and when it's all done you have a super casual skirt that you can wear in the summer times.
My t-shirt of choice had a stain or two. It was unsightly and so I dip-dyed it in the kitchen sink. Do you want me to tell you how I did that? It was really easy.
I took a large bowl and filled it halfway with water. Then I squirted in some blue paint and mixed it up a little. Starting at the bottom, I dipped it and let the water soak and creep up. So it's darker at the bottom and that's cool. Pretty neat. Anyway, I'm pleased.
So that's what I did, today.
Now I've had some pizza, I'm about to eat my favorite kind of ice cream and I'm watching a movie with my friend.
1 comment:
I LOVE THIS AND I WANT TO DO IT...and I just might. Soon.
Brilliant. Thank you for sharing. Also, it looks super cute on you.
Post a Comment